One of the most common questions that comes up is: how do I set levels? And understandably so. Level setting is crucially important to getting a good recording, and yet there is no clear, simple guidance out there on how to do it — not because people don't want to help, but because there simply isn't any easy set of rules for this.
In my video episode "Technique", I give a basic introduction to level setting, which essentially says start at -12dB and err on the low side. I think that's reasonable advice as a starting point, but it's still pretty minimal; again because, at least as far as I know, there just isn't any simple set of rules I can tell you about.
Despite this, I'm going to have a go at providing more explanation, which might help a beginner to get through this. Please remember that I'm no expert field recordist, and I'm really just figuring this stuff out myself; but maybe this will help.
Your meters are the key tool that you will use for setting levels. Trying to figure it out by the loudness of the sound in your headphones is hopeless, because that will totally vary depending on your recorder's headphone amplifier, the sensitivity of your headphones, and of course the setting of your headphone volume. And the sensitivity of your ears! The meters on your recorder are the only real guide you have.
So the first thing to do is understand your meters. And yes, this will mean reading the manual — sorry!
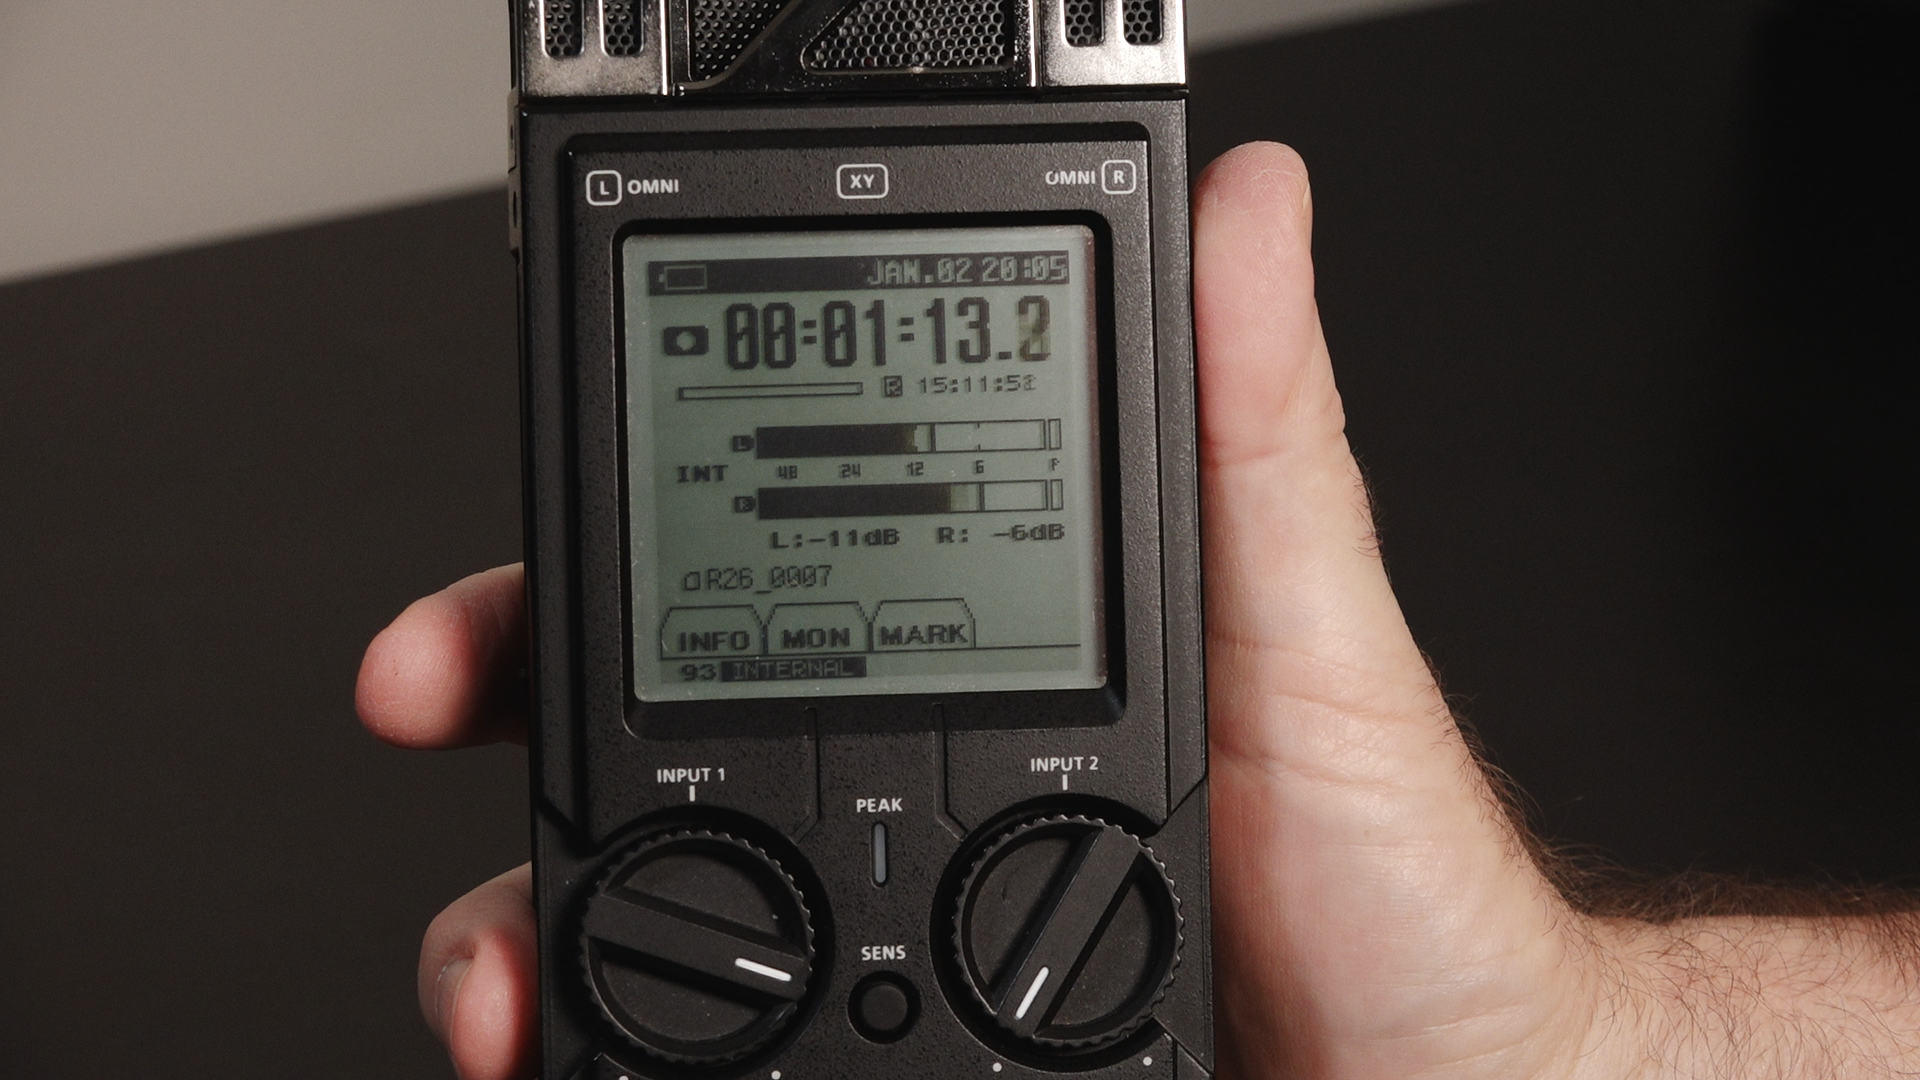
Your recorder's meters should be calibrated in dB, or decibels. (If not, perhaps you should look into getting a real audio recorder.) If it has actual numbers along the scale, as with the R-26 shown here, so much the better; but it should at least tell you the levels in dB, and have marks on the scale corresponding to key levels, like -12dB in particular.
The loudest end of the scale — the right-hand end — is generally 0dB, and quieter levels are negative numbers. This might seem backwards, and if you want to know why, read about logarithms; it's too much to cover here. But basically there's no such thing as a quietest sound (which is like saying there's no logarithm of zero). The loudest sound is clear-cut — it's where the digital samples would be larger than the largest number you can record, and so the audio would clip. So that's our reference point; and the crucial thing about setting levels is to never let the meters go above 0dB, because that results in clipping, a horrible distortion that you can't remove later.
(If you have floating-point recording, then you have a lot more flexibility than this; but that's a whole other subject.)
So know your device's meters; know how to read the display, and what the various markings on the display mean. In particular, know where -12dB is on your meters, because that's a handy reference point.
The basic advice about setting levels is fairly simple:
Don't worry about the level of your finished, published work; you will set that level when you edit. The level you record at isn't the level of what you publish. When recording the key thing is to capture a good, clear recording, so that you can manipulate it any way you want when you edit.
If your source is really constant, you could turn the levels up above -12dB; but there's not much point in this, because the dynamic range of modern recorders is easily enough to capture everything, clearly, at -12 or even well below.
If your level knobs are at the extreme ends of their ranges, adjust the gain in the menu. You ideally want the level knobs to be working in about the middle halves of their ranges, to make sure that you can tweak the levels without hitting the extremes.
For example, if your level knobs are all the way to the left, and the meters are still reading too high, turn down the gain in the menu (from high to medium to low, for example, depending on how your recorder works). If the meters are still too high, then this is a case where the "pad" or "attenuate" feature on your mic, if it has one, could help. If the meters are still too high, then move farther from your source; or maybe use a dynamic mic, which can handle loud signals. If it seems that the loud sound is a low-frequency rumble, which you don't want, then the low-cut filter in your mic or recorder may help, by removing the rumble before the sound is digitised.
On the other hand, if your level knobs are all the way to the right, and the meters are reading too low, turn up the gain in the menu (from low to high, for example). Make sure that the "pad" or "attenuate" feature on your mic, if it has one, is turned off. If the meters are still too low, then you'll need to move closer to your source. A more sensitive mic could help, if you're using something relatively insensitive, like a dynamic mic.
That's just a basic rule of thumb, but at least this might get you started for recording in a simple setting, where you can monitor the subject as you set up. But life isn't always that simple, so read on...
The true story is that nobody can tell you what to set your levels to, because there's no one right answer. This is a skill which you need to develop in yourself by practising with your gear, until you understand the effects of the level settings.
Let's say, for example, that you're setting up a mic to record a quiet cityscape at night. What level should you set?
If you follow the advice above, and set the ambient sound when you're setting up to be at -12dB, then your recording will likely be way too loud. While you're setting up, everything is really quiet; but maybe later on some foxes start quarreling right in front of your mics, and your recording will be hopelessly clipped. Or the dawn chorus starts at 4am and is surprisingly loud.
The issue here is that you can't set your system up for the loudness of your subject, because the subject isn't making sound — or isn't even there — when you're setting up. So what do to?
Clearly a good guide here would be to start at a much lower level; maybe set the meters so that the basic ambience is just making the meters move definitively above the bottom of the range, maybe around -40dB. Then you'll have plenty of headroom if something interesting comes along later. But will that headroom be enough? Or too much?
And, of course, your intentions matter. If a police car goes by with its siren blaring, your recording will likely be massively clipped. Do you want to deal with that, by setting the level even lower, which might mean sacrificing quiet sounds? Or will you just cut that part out in post? Only you can decide.
Only experience can tell you you to handle levels. Have a guess at a good recording level, try it, and see what happens. Then try something different. And this, unfortunately, is the answer; you just need to experiment, get familiar with how your gear works, get familiar with your subject, and then develop an instinct for how to set the levels. Of course it's not easy, not least because your subject is always changing; but that's it.
One thing that can definitely help with unpredictable subjects is if your recorder has a "safety track" feature; in other words, the ability to record one track (which may be stereo) at a set level, and simultaneously record the same sounds to a separate track but at a lower level. This gives you the option to pick whichever track works best — or even fade between the two tracks — in post.
If you're recording really quiet sources, it might be worth doing some controlled tests with your gear. Some recordists report that a recorder gets a lot noisier at the top of its gain range, so it might be better to record lower and boost in post; however, some recordists report the opposite! Personally, I've usually been surprised at how much a quiet recording can be boosted later and still sound good; but whether this works for you will depend on your recorder.
So test your gear — record a very quiet source at medium gain, and at high gain; then boost both recordings in post to the same level, and see which one has less noise, in terms of hiss from the recorder.
Controlled tests like this can really help you to get the best from your gear, so if you're stuck indoors on a rainy day — or in lockdown — give it a go. At the very least you might learn something about the characteristics of your equipment.
If you're lucky enough to own a recorder with floating-point recording, what then?
Well, I've only recently started dabbling in this myself — and in fact the concept is new enough that there isn't a lot of knowledge out there — but my take on this is, do it just the same as you would with conventional (integer) recording. You just don't need to be so worried about going over 0dB and clipping, because you can pull the recording down in post. But the level knobs will set the "default" level of your recording, and keeping that in a sensible range seems like a good idea to start with.
And yes, at least on the recorders I've looked at, the level knobs really do set the levels in 32-bit mode. On the Zoom F6, for example, the level knobs by default work up 'til you press record, then switch modes to be faders. You can change this in the menus.